Category

Live Belle Vie

blue and white summer tablescape

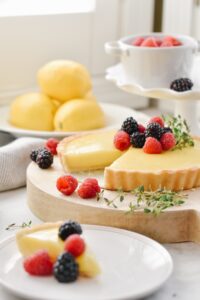
Fresh Lemon Tart

By Live Belle Vie


Fresh Lemon Tart

Happy Sunday! I am on a serious tart kick and I’m not sure it’s going to end any time soon!😋 This Lemon Tart is out of this world! Fresh and creamy with a delectable sweet, flaky crust. It is simply perfection and would be dazzling for a spring or summertime gathering.


The BEST Fresh Lemon Tart

Recipe courtesy of Pretty Simple Sweets

Crust:

Ingredients
    • 1 1/4 cups all-purpose flour
    • 1/2 cup powdered sugar (or 1/4 cup granulated sugar)
    • 1/4 teaspoon salt
    • 1/2 cup cold butter, cut into small cubes
    • 1 large egg
    • 1/2 teaspoon vanilla extract , optional
Instructions
    1. Process flour, sugar, and salt in a food processor for a few seconds until combined. If you don’t have a food processor, you can do this by using a pastry cutter. Add butter and pulse until mixture becomes crumbly and resembles coarse meal, about 15 pulses. Add egg and vanilla extract and keep pulsing until the dough is no longer dry and starts to clump together, about 10-15 seconds. Do not process to the point that a large ball of dough is formed; rather the dough should be quite crumbly with large clumps. Another way to check if it’s done is to take a piece of dough and press it between your thumbs – the dough should stick without feeling dry or crumbly.
  1. Turn dough to a lightly floured surface and form into a ball. It should come together easily without being sticky. Flatten ball slightly with your hands to form a thick disc. Wrap with plastic wrap and refrigerate for at least 1 hour.
  2. If you don’t want to use the dough right away, you can refrigerate it for up to 3 days, or freeze it for up to a month and then thaw overnight in the fridge.
  3. To roll out the dough: Take dough out of the fridge and let it sit on the counter for a few minutes to soften slightly for easy rolling. On a lightly floured surface, roll the dough out into an 11-inch circle, then place gently into a 9-inch tart pan(preferably with a removable bottom); you can do this by flouring a rolling pan and rolling the dough loosely around it, then unrolling it into the pan. Brush away any excess flour on the surface. With a sharp knife, trim the edges of the pastry to fit the tart pan. Cover pan with plastic wrap and place in the freezer until firm, about 30 minutes. Frozen dough is less prone to shrinking while baking.
  4. To bake the crust: Preheat oven to 375F/190C and place rack in the center.
  5. Press parchment paper or aluminum foil tightly against the crust, covering the edges to prevent them from burning. Fill with pie weights/dried beans/uncooked rice, making sure they’re fully distributed over the entire surface.
  6. Bake crust for 20 minutes, until foil no longer sticks to the dough. Transfer crust to a wire rack and remove weights and foil.
  7. To partially bake the crust: Bake for 5 minutes longer. You’ll now need to proceed with your tart recipe, add the filling, and finish baking. According to your recipe, the crust should be used either while warm or after it’s been left to cool on a wire rack.
  8. To fully bake the crust: Bake for about 10 minutes longer until golden brown and dry. Transfer to a wire rack and let cool completely.
Lemon Curd Filling
    • 2 large eggs plus 2 egg yolks (or 3 whole eggs)
    • 3/4 cup granulated sugar
    • 1 tablespoon lemon zest
    • 1/2 cup freshly squeezed lemon juice (2-3 lemons for both zest and juice)
    • 2 tablespoons heavy cream, optional
    • 1/2 cup unsalted butter, cut into small pieces
    1. To make the lemon curd:

      In a medium heatproof bowl, place eggs, sugar, lemon zest, lemon juice, and heavy cream, if using, and whisk to combine. Place the bowl over a saucepan of simmering water (bain-marie). Cook on moderate heat, whisking constantly, until mixture becomes thick (mine was ready in 10 minutes, but it can take up to 20). If you have a thermometer, it should register 170°F/75°C; otherwise, it should coat the back of a wooden spoon and leave a clear pass if you run your finger through it. The curd will thicken more once cooled.

      2. Remove from heat and immediately strain mixture through a sieve. Add butter, a few cubes at a time, and whisk until completely melted and incorporated, and mixture is smooth. Take your time with it—the whisking makes for an airy and light texture. Allow to cool to room temperature before filling the tart. (Lemon curd can be kept in an airtight container in the fridge for up to a week, or can be frozen for up to 2 months. To thaw, place overnight in the fridge. Whisk the mixture to smoothen it before using.)

  1. Fill the tart shell with lemon curd, then refrigerate for at least 4 hours until chilled. Serve with berries and whipped cream if you like. The tart is rich, so cut your servings small.

Recipe: www.prettysimplesweet.com


blue and white summer tablescape

Blackberry White Chocolate Tart

By Live Belle Vie


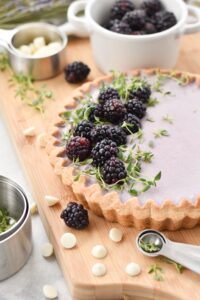
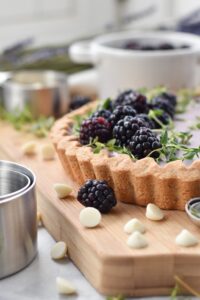
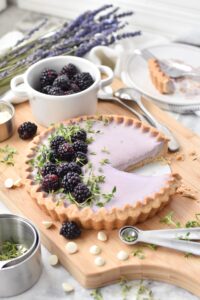
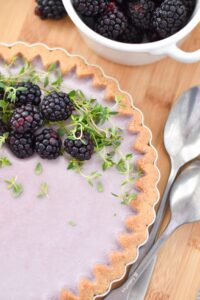
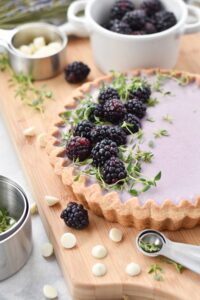
Blackberry White Chocolate Tart

Gluten-free and refined sugar-free, this lovely tart is a healthier dessert option featuring nutrient rich ingredients.


Served with antioxidant rich, tart blackberries that perfectly compliment the mild, coconut flavor.

Blackberry White Chocolate Tart

Ingredients:

Crust

  • 1 cup gluten free flour or oat flour 
  • 1 cup almond meal
  • 2-3 tbsp pure maple syrup 
  • 1/4 cup coconut oil
  • pinch of salt (optional)

Filling

  • 1/4 cup plus 2 tablespoons cashews, soaked for 4 hours then drained and rinsed
  • 1/2 cup fresh blackberries
  • 100 g white chocolate (can use Lily’s sugar free)
  • 1 can full fat coconut milk 
  • 2 tablespoons pure maple syrup 
  • 1/2 tsp agar agar powder or gelatin 

Garnish

  • Fresh blackberries  

Instructions

Crust

  1. Preheat oven to 350 degrees. Grease an 8″tart pan. Set aside.
    In a food processor, combine crust ingredients and pulse to combine. You should get a moist mixture that can be easily moulded. Firmly press into bottom and up the sides of tart tin. Bake for 20-25 minutes until crust is golden brown. Transfer to a wire rack and let it cool while you’re preparing the filling.

Filling

  1. Blend blackberries and 2 tbsp of water (I used a magic bullet) and then strain through a sieve to remove seeds.

  2. Add white chocolate, coconut cream into a saucepan and place on the stove on low heat. When the mixture becomes warm and the white chocolate has melted, add the agar-agar and maple syrup. Stirring constantly, cook until agar completely dissolved. In a food processor, add the white chocolate-coconut cream, blackberry mixture, soaked cashew nuts. Process until smooth. Pour the filling into the crust. Place tart in the fridge overnight to set. Garnish and enjoy!

    Original recipe: www.nmmeiyee.com (slightly modified)


blue and white summer tablescape

Spring Charcuterie Board

By Live Belle Vie

I would like to introduce you to my newest obsession!

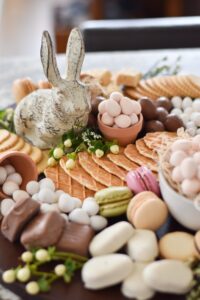
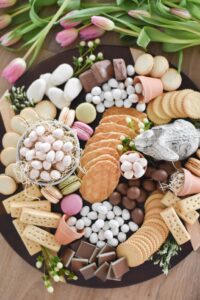
spring confectionery board, easter confectionery board, spring charcuterie board, easter charcuterie board

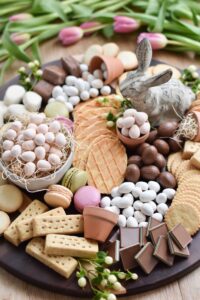
Spring Confectionery Board

I realize I am like a decade late to the charcuterie board craze (or 700ish years- depending on how you look at it LOL)  Admittedly, my germaphobic tendencies had me avoiding this all-hands-on-deck type of food presentation (countless hands helping themselves, rummaging through for their favorite picks…well, that’s just enough to make my stomach turn! haha!) but a gorgeous board on Pinterest had me swooning and changed my mind forever!  And the looks on my kid’s faces when they saw the finished product was enough for me to fully embrace the idea.  Their eyes lit up, “You mean, we can eat EVERYTHING on here??”  It is such a delight for children and adults alike to gaze upon a beautifully presented feast.

butter waffles, dessert, spring eats, easter food, easter dessert, easter appetizer

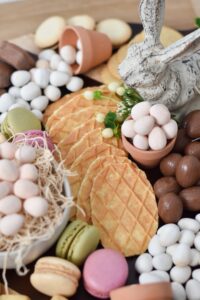
I love these egg shaped butter waffles!

easter, dessert, spring, charcuterie board, confectionary board, easter confectionary board

spring charcuterie board, easter charcuterie board

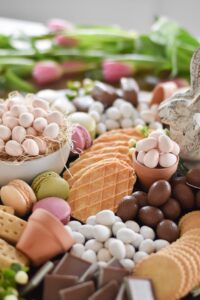
This spring confectionery board was so fun and {bonus} can be made in advance since nothing is perishable!  A perfect addition for any Easter or spring celebration!

spring confectionary charcuterie boardspring, easter, dessert, charcuterie

Here are links to everything I used:

Belgian Butter Waffles 

Meyer Lemon Cookie Thins

Crispy Cookies

Macarons

Walkers Shortbread Cookies

Fernwood Mint Sandwiches

Reeses White Chocolate Eggs

Cadbury Mini Eggs

Cadbury Mini Cream Easter Eggs

Peanut Butter Snickers

Mini Clay Pots

Super Moss Filler

Mini Bowl

Bunny – Smiths Marketplace

Tulips and greenery filler were purchased at Trader Joes.

(The first 6 items were purchased at Trader Joes. I have provided links where I could just to show what the items are but purchasing directly at Trader Joes is most cost effective.)

spring confectionery board, easter confectionery board, spring charcuterie board, easter charcuterie board

Spring Confectionery Board

Such a fun and beautiful addition to any spring celebration.  Happy Charcuterie Boarding!

xoxo Heidi


blue and white summer tablescape

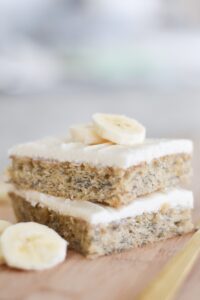
Banana Bread Bars with Browned Butter Frosting

By Live Belle Vie

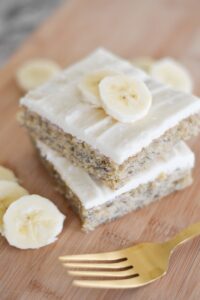
Hello friends!  I hope you are having a beautiful week!  What are you up to?  I have been so busy the last couple months with birthdays, homeschooling etc. It seems like every week has been filled to the brim with extracurriculars so with some down time this week I am really looking forward to organizing my house!  It’s funny the things that excite me these days, LOL.  Anyway…..These banana bread bars with browned butter frosting are to die for!! The browned butter used in the frosting make them out of this world. Do you ever use browned butter in your baking or cooking?  It takes a little extra effort but is soooo worth it.  My kids pretty much drink it on its own and let’s be honest, so do I!  No matter what kind of week you are having, these will make it better. 🙂

Banana Bread Bars with Browned Butter Frosting

Banana Bread Bars with Browned Butter Frosting

Banana Bread Bars with Browned Butter Frosting


Banana Bread Bars with Browned Butter Frosting

Ingredients:

1 1/2 cups white sugar

1 cup sour cream

1/2 cup butter, softened

2 eggs

1 3/4 cups mashed ripe banana (about 3 bananas)

2 tsp vanilla extract

2 cups all-purpose flour

1 tsp baking soda

3/4 tsp salt

1/2 cup chopped walnuts (optional)

Frosting: (I always double!)

1/2 cup butter

4 cups powdered sugar

3 TBS milk

1 1/2 tsp vanilla


Directions:

1  Preheat oven to 350 degrees.  Grease and flour a 15X10 inch jelly roll pan.

2 Beat white sugar, sour cream, 1/2 cup softened butter, and eggs in a bowl with an electric mixer until creamy.  Beat in bananas and 2 teaspoons vanilla.   Add flour, baking soda, and salt; mix for 1 minute.  Stir walnuts into batter until evenly incorporated.  Spread batter in prepared pan.

3 Bake in the preheated oven until golden, about 24 minutes.  Cool.

4  Melt 1/2 cup butter in a large saucepan over medium heat until bubbling and golden brown, 3 to 5 minutes.  Remove from heat.

5 Whisk powdered sugar, milk, and vanilla extract into melted butter until a smooth frosting consistency is reached.  Spread frosting over cooled banana bars and devour!

banana bread, banana, recipe, baking, homemade, sweet, treat, dessert

Banana Bread Bars with Browned Butter Frosting

Banana bread bars, banana bread, banana, dessert, recipe, treat, sugar, baking

Banana Bread Bars with Browned Butter Frosting

xoxo Heidi


blue and white summer tablescape

Divine Strawberry Frosting

By Live Belle Vie

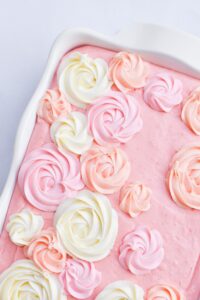
When life gives you strawberries, make this divine strawberry frosting!  A simple recipe that really showcases the flavor of fresh strawberries.  Served on vanilla cake, it is absolute perfection!

Strawberry, Frosting, Cake, Decoration, Decorating, Rosettes, Pink, Sugar

Strawberry Frosting with Buttercream Rosettes


Strawberry Frosting

Ingredients:

1 cube of butter, softened

1 cup of strawberries, pureed

powdered sugar (start with 2 cups, then add more to desired consistency)


Directions:

Combine all ingredients, starting with 2 cups of powdered sugar, in a stand mixer using the paddle attachment. Add more sugar until desired consistency is reached.  Spread over vanilla cake and Enjoy!!


xoxo Heidi


blue and white summer tablescape

Summer Tablescape

By Live Belle Vie

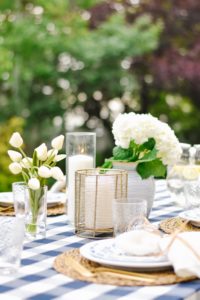
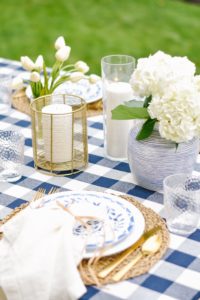
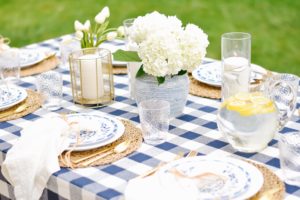
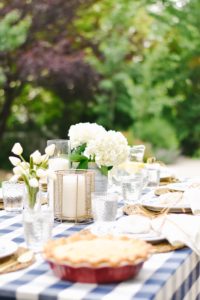
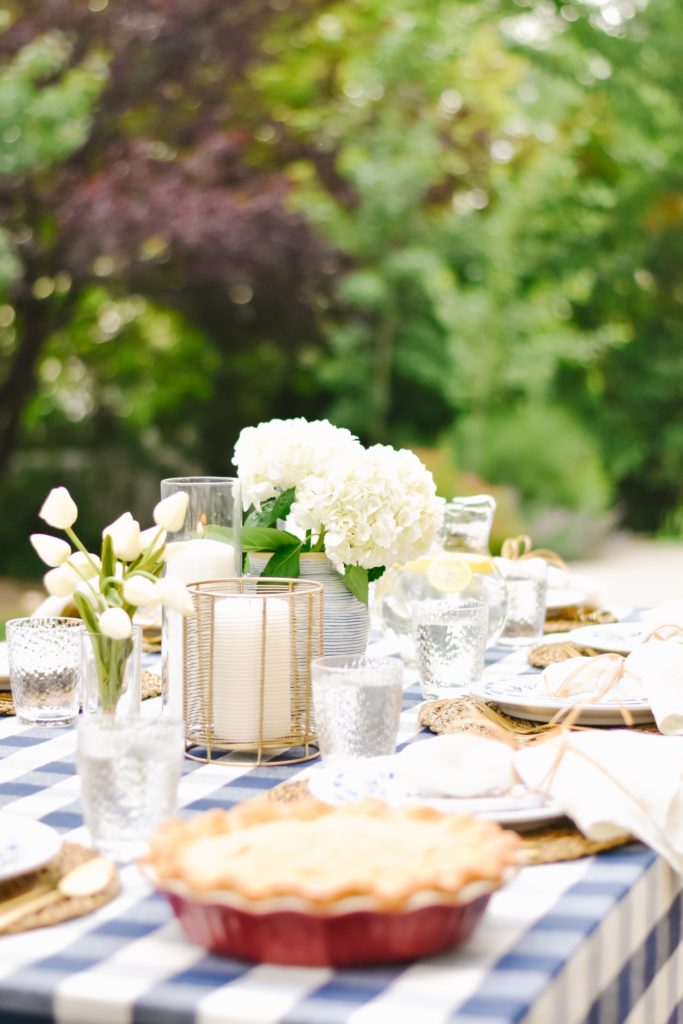
Summer is in full swing around here and we just cannot get enough of being outside- and that means eating dinner outdoors whenever we get the chance!  This was a simple tablescape I put together using easy to find, affordable pieces from places like Target, Ikea, Walmart and Amazon.  I have linked most of these items below, but I am a firm believer that you certainly do not need to purchase everything new to do a table.  See that gold candle holder? It’s actually a utensil holder!  And raffia for napkin rings. Repurposing and being creative is the best way to go and you’d be surprised what you can pull together!

blue summer table setting

My favorite thing about tablescapes is the feeling it brings to any gathering.  It says, “Welcome!  Come sit and stay a while!  We are SO glad you’re here!”  It’s so delightful to gather around a beautiful setting, enjoy delicious food and simply talk, laugh and connect.

Blue white and gold tablescape

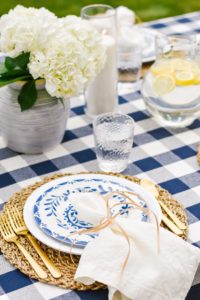
I fell in love with this simple blue vase from Target and I have used it over and over again!  The gold candle holder is actually a utensil holder but I loved the way it looked with a candle.  I’m always looking for versatile design pieces!

This blue buffalo check table cloth is an absolute classic and pairs well with so many summer looks!

blue and white summer table

And this gorgeous silverware.  Need I say more? Cups are plastic and perfect for outdoor gatherings.

blue and white melamine plate

And, my favorite melamine plates!  I found a similar option at Pottery Barn with a much larger price tag.  These equally beautiful plates won’t break the bank at just $2 each!

I hope this post inspires you to put a table together and invite some loved ones over to enjoy. It’s the best way to spend a summer evening! Xx Heidi


1920 PROSPECTOR AVE
PARK CITY UT
84060